Those of you who live on Long Island have most likely had the privilege of tasting a cake known as a Philly Fluff. It isn't a special looking cake,as a matter of fact,it just looks like a simple pound cake. What makes a Philly Fluff special is its texture and taste.....it is a delicious treat! As a young girl,I worked in a local bakery that made the best fluffs around.....had I known that I would later become a baking fanatic and blogger,I would have asked for the recipe! Sadly,I didn't, and so I continue my quest to figure out how to make this favorite cake of mine.
After much research and kitchen play time,I concocted what I believed would be a chocolate chip Philly Fluff...but that didn't happen.Instead,I made a rather delicious pound cake. So,here I give you a great recipe for a pound cake,and I continue my quest to get the perfect texture and unmistakable taste of the elusive Philly Fluff. Just a word of warning,there may be a few more delicious pound cakes to come,but who doesn't love a great piece of that?
INGREDIENTS:
10 oz. cream cheese,softened
2 sticks of butter,softened
1-3/4 c. Sugar
2 tsp. vanilla
5 eggs
2c. flour
1 tsp. baking powder
1/2 tsp. salt
1/4 c. chocolate chips
In the bowl of your mixer,blend the cream cheese and the butter. Add the sugar,followed by the eggs,and vanilla. Add the dry ingredients,EXCEPT, the chips,and blend only until the mixture comes together.
Grease two loaf pans.Sprinkle the bottoms with the chocolate chips.
Divide the mixture between two loaf pans,filling each about 3/4 of the way full. Bake at 325 degrees for about one hour,or until a toothpick inserted in the cake comes out clean.. Let cool,sprinkle with powdered sugar if desired. Slice and serve. Enjoy!
*** These also make a great addition to your child's lunchbox!
Wednesday, August 22, 2012
Monday, August 20, 2012
Granola
In some towns,the school year has begun,in others,it soon will.We will all be back to making lunches and snacks each day.Here is a healthy snack for your children's lunch boxes.It is easy to make,and very versatile.This version is made with walnuts,because that is what I had handy,but you can use pecans,almonds,or cashews.You can also add dried figs,cherries or both.The original recipe comes from Ina Garten.
Ingredients:
2c. oats
2c. coconut
2 c. nuts of your choice
3/4 c. vegetable oil
1/2 c. honey
dried apricots,chopped
dried cranberries,chopped
Mix together the oats,coconut,oil and honey in a large bowl.Spread the mixture on a baking sheet lined with parchment(this makes for an easy cleanup). Bake at 350 degrees,mixing occasionally,until the granola is golden brown.
Remove from the oven and let cool. Once the mixture is cool,add the assorted dried fruits.Store in an airtight container for up to two weeks.
***Please keep in mind that this snack contains nuts,as some schools have policies in place that do not allow nuts in school in order to protect students with severe allergies.
***Try adding a fun tag to your child's snack. The tag used above are a free printable from www.amandaparkerandfamily.blogspot.com
Ingredients:
2c. oats
2c. coconut
2 c. nuts of your choice
3/4 c. vegetable oil
1/2 c. honey
dried apricots,chopped
dried cranberries,chopped
Mix together the oats,coconut,oil and honey in a large bowl.Spread the mixture on a baking sheet lined with parchment(this makes for an easy cleanup). Bake at 350 degrees,mixing occasionally,until the granola is golden brown.
Remove from the oven and let cool. Once the mixture is cool,add the assorted dried fruits.Store in an airtight container for up to two weeks.
***Please keep in mind that this snack contains nuts,as some schools have policies in place that do not allow nuts in school in order to protect students with severe allergies.
***Try adding a fun tag to your child's snack. The tag used above are a free printable from www.amandaparkerandfamily.blogspot.com
Monday, August 13, 2012
Quick Tip for Freezing Berries
Here is an easy way to freeze your delicious ,ripe summer berries so that you may enjoy them all year long!
Place a piece of parchment paper on a baking sheet.Spread out you UNWASHED berries ,making sure they are not overlapping.Place in the freezer for about one hour.
Remove the berries from the freezer,and place in either freezer bags,or airtight containers.
Enjoy the berries throughout the winter in smoothies,pies,muffins, tarts,or just by the handful!
Place a piece of parchment paper on a baking sheet.Spread out you UNWASHED berries ,making sure they are not overlapping.Place in the freezer for about one hour.
Remove the berries from the freezer,and place in either freezer bags,or airtight containers.
Enjoy the berries throughout the winter in smoothies,pies,muffins, tarts,or just by the handful!
Peach Cake
Here is another recipe featuring,you guessed it, more peaches!If you are a fan of coffee cake,this is a cake for you. It has fresh peaches and subtle hints of sour cream.The top crust is crispy and delicious.It comes from Ina Garten,and is a great ending for any summer meal.I like to slice the peaches on the thin side so I do not have huge chcunks of fruit to bite into. Feel free to add extra peaches if you would like some added sweetness,just make sure they are ripe!
Topping:
1/2 c. sugar
1 tsp. cinnamon
Mix both imgredients together,and set aside until ready to use.
Ingredients:
1 stick of butter,softened
1 c. sugar
2 eggs
1 c. sour cream
1 tsp. vanilla
2 c. flour
1 tsp. baking powder
1 tsp. baking soda
1/2 tsp. salt
3 large peaches,peeled,pitted,and sliced
In the bowl of your mixer,blend together the butter and sugar.Add the eggs and vanilla.Add the baking powder,baking soda,and salt.Gradually add the flour,mixing only until combined.Do not overmix.
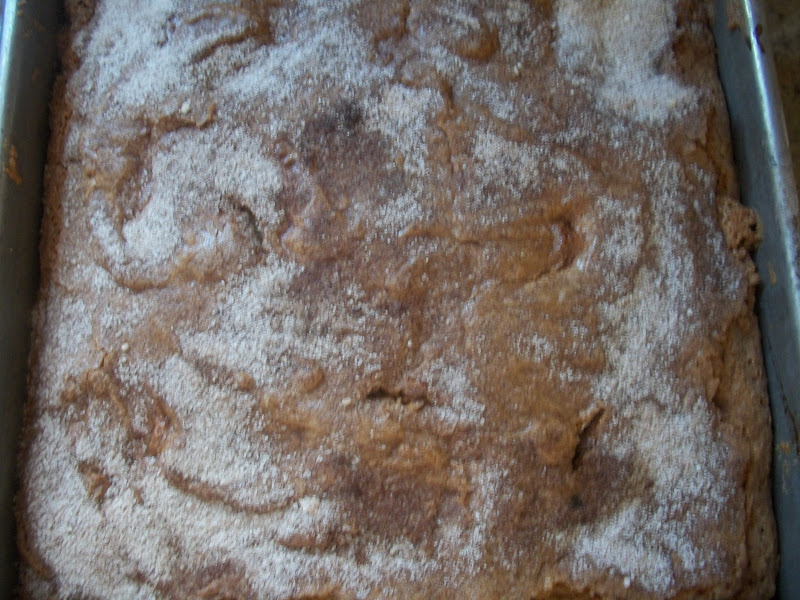
Butter a square 9 inch baking pan.Spread half of the mixture into the pan.Layer the peaches on top of the mixture,and sprinkle with half of the cinnamon-sugar mixture.Top with the remaining batter,spreading it out as well as you can.Top with the remaining cinnamon-sugar mixture.
Bake at 350 degrees for about 45 minutes.Serve warm,if desired,with a scoop of ice-cream,a dollop of whipped cream,or all on its own. Enjoy!
Topping:
1/2 c. sugar
1 tsp. cinnamon
Mix both imgredients together,and set aside until ready to use.
Ingredients:
1 stick of butter,softened
1 c. sugar
2 eggs
1 c. sour cream
1 tsp. vanilla
2 c. flour
1 tsp. baking powder
1 tsp. baking soda
1/2 tsp. salt
3 large peaches,peeled,pitted,and sliced
In the bowl of your mixer,blend together the butter and sugar.Add the eggs and vanilla.Add the baking powder,baking soda,and salt.Gradually add the flour,mixing only until combined.Do not overmix.
Butter a square 9 inch baking pan.Spread half of the mixture into the pan.Layer the peaches on top of the mixture,and sprinkle with half of the cinnamon-sugar mixture.Top with the remaining batter,spreading it out as well as you can.Top with the remaining cinnamon-sugar mixture.
Bake at 350 degrees for about 45 minutes.Serve warm,if desired,with a scoop of ice-cream,a dollop of whipped cream,or all on its own. Enjoy!
Saturday, August 11, 2012
Blueberry Peach Crumbles
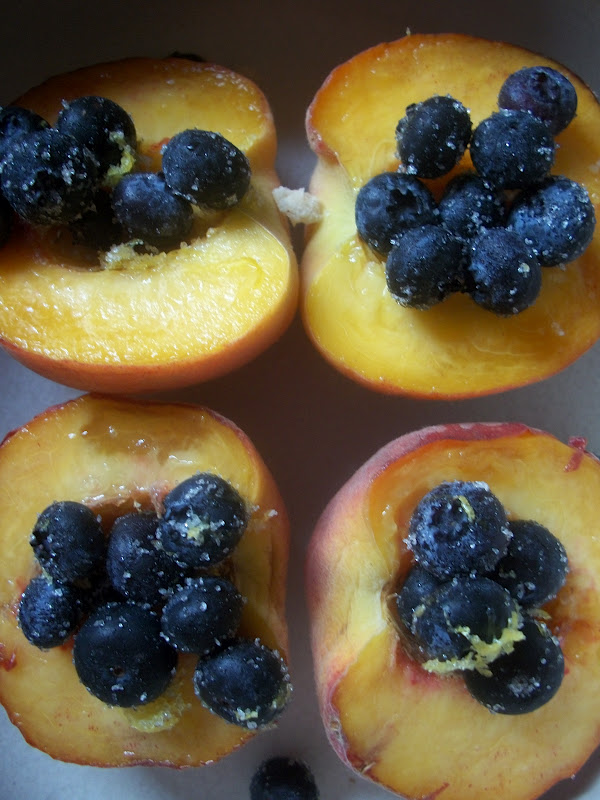
After our trip to the peach orchard the other day,I am up to my ears in peaches.Here is the first of a few different peach recipes that I have for you.This one is really quite easy,and delicious.Just make sure your peaches are ripe!!This recipe was made for two,so just adjust it as needed to make more....you really can't go wrong.
Ingredients:
2 large peaches,cut in half,pits removed
Crumb Topping:
1/4 stick of softened butter
1/4 c. flour
1/4 c. oats
1/4 c. brown sugar
pinch of salt
3/4 tsp. cinnamon
Using your fingers,blend all of the ingredients together in a small bowl.Keep mixing until you can easily form large crumbs that hold together. Set aside.
Blueberry Mixture:
1/4 c. fresh blueberries
1 tsp. sugar
zest of one lemon
Mix all ingredients together and set aside until ready to fill the peaches.
In an oven proof baking dish ,place the peaches,cut side up.Fill the centers with about 1 Tbsp. of the blueberry mixture.Cover the peach with a generous amount of the crumb mixture.
Bake at 350 degrees for about 30 minutes. The crumbs should be golden brown,and the fruit should be soft and bubbling. Serve with vanilla ice-cream and a drizzle of honey .
These can also be made without blueberries....just peaches and crumbs.They will be equally delicious!
*** The crumbs can be made ahead and frozen in a freezer bag or container.It is a great topping for any type of fruit crisp.
Ingredients:
2 large peaches,cut in half,pits removed
Crumb Topping:
1/4 stick of softened butter
1/4 c. flour
1/4 c. oats
1/4 c. brown sugar
pinch of salt
3/4 tsp. cinnamon
Using your fingers,blend all of the ingredients together in a small bowl.Keep mixing until you can easily form large crumbs that hold together. Set aside.
Blueberry Mixture:
1/4 c. fresh blueberries
1 tsp. sugar
zest of one lemon
Mix all ingredients together and set aside until ready to fill the peaches.
In an oven proof baking dish ,place the peaches,cut side up.Fill the centers with about 1 Tbsp. of the blueberry mixture.Cover the peach with a generous amount of the crumb mixture.
Bake at 350 degrees for about 30 minutes. The crumbs should be golden brown,and the fruit should be soft and bubbling. Serve with vanilla ice-cream and a drizzle of honey .
These can also be made without blueberries....just peaches and crumbs.They will be equally delicious!
*** The crumbs can be made ahead and frozen in a freezer bag or container.It is a great topping for any type of fruit crisp.
Tuesday, August 7, 2012
Roasted Vegetable Sandwiches
This recipe is more about assembling than it is cooking,but when using the best ingredients,it is delicious!!Each week,I visit the local italian food store ,or the italian stand at the farmer's market.I purchase the ingredients for this sandwich,then head home to make them.It is important to only use FRESH mozzarella,not the hard block you find at the grocery store.The peppers I buy are marinated in oil and garlic,giving them tons of flavor.You can roast your own peppers,and make your own pesto(recipe below), but for those summer days when you want to get up and moving,it doesn't get any easier or tastier than this.
Ingredients:
1 loaf of good,crust italian bread
pesto
fresh mozzarella or smoked mozzarella
roasted peppers
olive oil
Slice the italian bread.Spread one side with about one Tbsp. of pesto.Place two slices mozzarella on top,followed by the roasted peppers.Top with another slice of bread.
Brush a skillet with a little bit of olive oil,then place the sandwiches in the skillet.Cook over medium heat for about 5 minutes,or until golden.Flip the sandwich,and cook until crisp and golden.
Pesto:(Barefoot Contessa Recipe)
4-5 c. packed fresh basil leaves
8-9 cloves of fresh garlic
1 tsp. salt
1 tsp. pepper
1 c. freshly grated parmesan
1/4 c. pignoli nuts
1/4 c. walnuts
1-1/2 c. very good olive oil
Place all of the ingredients except the oil in a food processor.Blend until combined.With the machine running,slowly add the oil and process until combined,about one minute.
The pesto can be frozen,just pour it into small freezer safe containers,and add about one teaspoon of olive oil on top to coat .Seal and freeze for later use.
For those of you not familiar with pignolis,this is what they look like.
***This can also be made as an open-faced sandwich,just use one slice of bread,top with pesto,peppers,and mozzarella,and bake under the broiler.
**This sandwich can also be made using a panini press.Feel free to add additional ingredients such as tomato,grilled eggplant,grilled zucchini,or even grilled chicken.Enjoy!
Ingredients:
1 loaf of good,crust italian bread
pesto
fresh mozzarella or smoked mozzarella
roasted peppers
olive oil
Slice the italian bread.Spread one side with about one Tbsp. of pesto.Place two slices mozzarella on top,followed by the roasted peppers.Top with another slice of bread.
Brush a skillet with a little bit of olive oil,then place the sandwiches in the skillet.Cook over medium heat for about 5 minutes,or until golden.Flip the sandwich,and cook until crisp and golden.
Pesto:(Barefoot Contessa Recipe)
4-5 c. packed fresh basil leaves
8-9 cloves of fresh garlic
1 tsp. salt
1 tsp. pepper
1 c. freshly grated parmesan
1/4 c. pignoli nuts
1/4 c. walnuts
1-1/2 c. very good olive oil
Place all of the ingredients except the oil in a food processor.Blend until combined.With the machine running,slowly add the oil and process until combined,about one minute.
The pesto can be frozen,just pour it into small freezer safe containers,and add about one teaspoon of olive oil on top to coat .Seal and freeze for later use.
For those of you not familiar with pignolis,this is what they look like.
***This can also be made as an open-faced sandwich,just use one slice of bread,top with pesto,peppers,and mozzarella,and bake under the broiler.
**This sandwich can also be made using a panini press.Feel free to add additional ingredients such as tomato,grilled eggplant,grilled zucchini,or even grilled chicken.Enjoy!
Monday, August 6, 2012
Garden Update
So, when I last posted about our garden project this summer,we had just started....if you remember ,it looked like this....
After a few weeks of watering,weeding out the less healthy plants ,and plenty of sunshine,it looked like this...
Now,we are at the point in the season where it has been incredibly hot,causing most of the lettuce to bolt and turn bitter,therefore we had to pull it out.Fortunately,we have plenty of seed to start our fall planting.So,while we are anxiously waiting for our eggplant,broccoli,peppers,cucumbers,pumpkins and more tomatoes to be ready, we have also planted more romaine,arugula,mesclun mix,and fennel.This week we will also be planting some cauliflower plants,brussel sprouts and possibly more potatoes.
All in all,I'd say we really had a successful first season.My son Timmy really worked hard tending to "his" (remember when it was my project?)
garden,and it has proven to be a wonderful hobby for him.He is already planning what he will be growing next summer,and is going to build another raised bed as well!
Here are a few pics of the fruits of his labor,along with some meals we prepared so far using our bounty! Many people have asked how we grew such beautiful(and delicious) potatoes....believe it or not,it was a potato seed/bag growing kit I found on QVC...it was easy and we had amazing results!
Here are some of our meals.... Have a sweet day!
Now,we are at the point in the season where it has been incredibly hot,causing most of the lettuce to bolt and turn bitter,therefore we had to pull it out.Fortunately,we have plenty of seed to start our fall planting.So,while we are anxiously waiting for our eggplant,broccoli,peppers,cucumbers,pumpkins and more tomatoes to be ready, we have also planted more romaine,arugula,mesclun mix,and fennel.This week we will also be planting some cauliflower plants,brussel sprouts and possibly more potatoes.
All in all,I'd say we really had a successful first season.My son Timmy really worked hard tending to "his" (remember when it was my project?)
garden,and it has proven to be a wonderful hobby for him.He is already planning what he will be growing next summer,and is going to build another raised bed as well!
Here are a few pics of the fruits of his labor,along with some meals we prepared so far using our bounty! Many people have asked how we grew such beautiful(and delicious) potatoes....believe it or not,it was a potato seed/bag growing kit I found on QVC...it was easy and we had amazing results!
Here are some of our meals.... Have a sweet day!
Subscribe to:
Posts (Atom)